
Tools needed:
Only pliers are required to assemble the Picavet Kit. For the Picavet Hardware Kit, assembly of the laminated shaft requires:
- electric drill (5/64 in. and 9/32 in. bits), or Dremel tool and small abrasive bit (for drilling small holes through carbon fiber tube)
- sandpaper, file, or whetstone
- two part epoxy glue
Make the shaft. The shaft now comes fully assembled in the Picavet Kit. Assembly required in the Picavet Hardware Kit.
- Mix 2 part epoxy and glue the small carbon tube inside the larger one. You are making an epoxy laminate tube, so ensure that epoxy fills the entire space between the two tubes. Additional epoxy should be forced into both ends of the tube with the 3 cm pieces of ABS filament which can be left in to make 2 to 3 cm at each end of the tube solid.
- When epoxy has dried, drill three holes through the shaft with a 5/64 in. or smaller bit. A better tool for this is an abrasive bit on a Dremel tool. Drill exactly through the center.
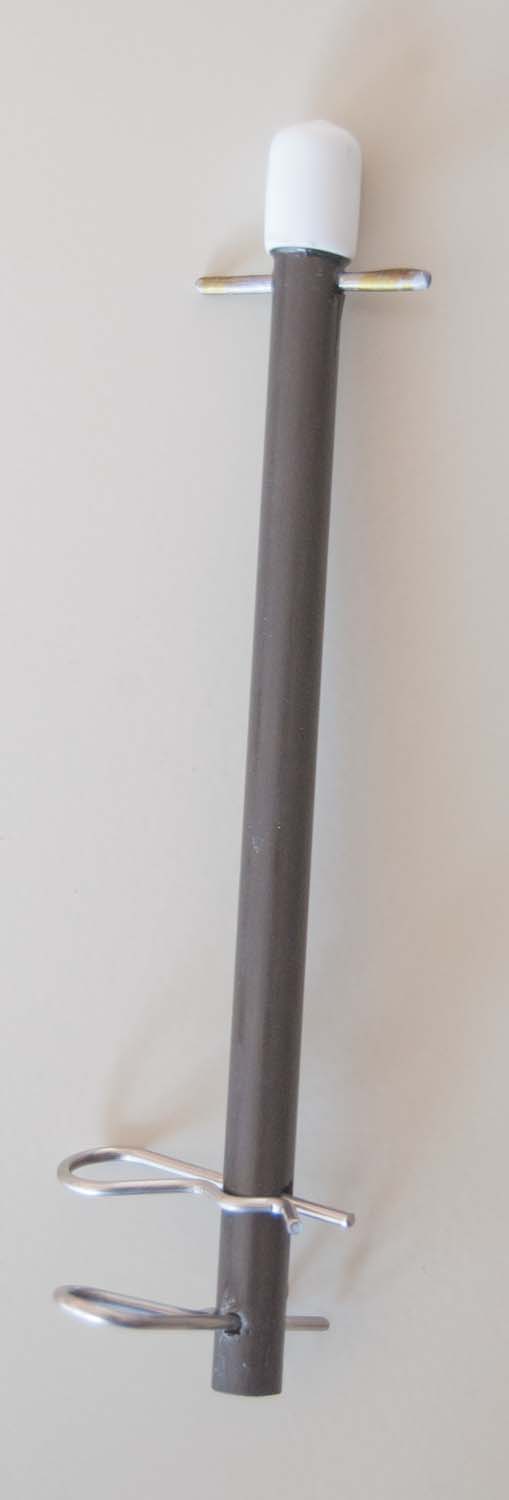
- One hole should be 1.5 cm from one end of the tube (for the locking rod at the top of the Picavet).
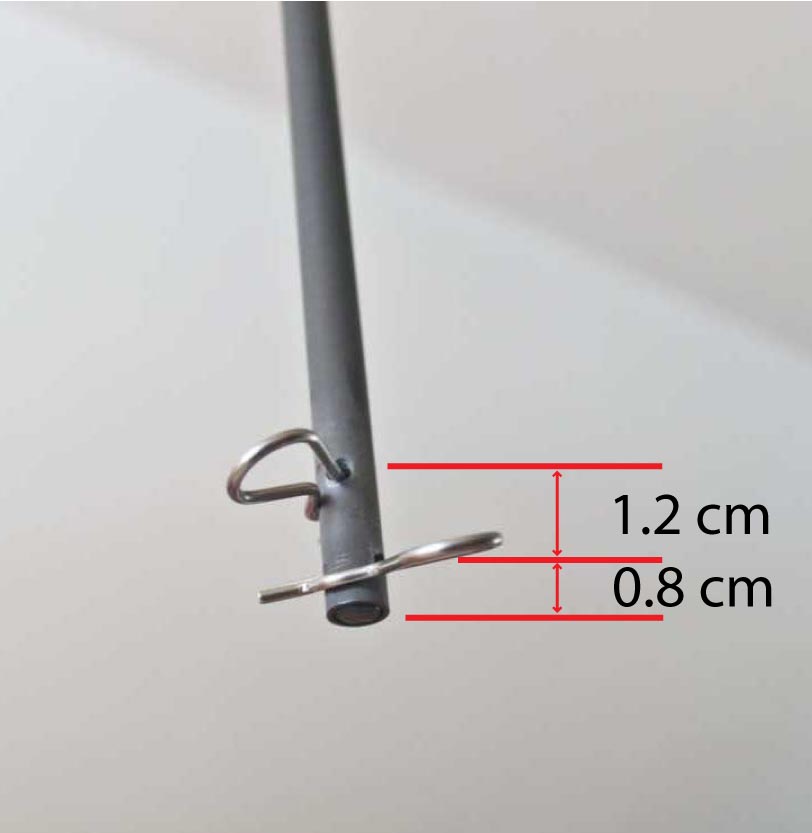
- One hole should be 2 cm from the other end (for the cotter pin through the plastic tube atop the rig upper frame).
- One hole should be 0.8 cm from the end in (2) (for the redundant cotter pin underneath the upper frame).
- Make sure the 2.5 cm metal rod is straight, and smooth the ends if rough or sharp.
- Mix 2 part epoxy and glue the 2 cm metal rod halfway through the lone hole at the top end of the shaft.
- Use the same epoxy to glue the vinyl cap on the top end of the shaft. Make sure the rod is straight and centered before the glue sets.
Attach eye bolts

- The 4 eyebolts should thread easily into the holes at the ends of the Picavet arms. If they feel secure, there is no need to thread nuts on the ends. If an eyebolt is loose, insert a thread or strip of plastic in the hole first. Just screw the bolts in until the bolt ends are flush with the far side of the Picavet arms. This is ideal because the unwieldy Picavet line cannot catch on the end of the bolts. The eyes of all the bolts should be parallel with the long axis of the Picavet cross.
Thread the Picavet line
- Refer to the diagram here: http://www.brooxes.com/newsite/Downloads/Picavet.pdf to lace the 30 foot line through the four eye bolts, the two KAP’n Hooks, and the small white nylon ring. Tie a good knot.
- To store the line:
- Join the two KAP’n Hooks with a rubber band
- Stretch the line and wrap it around the Picavet cross (a figure 8 works well).
- Secure the KAP’n Hooks to the cross with a rubber band.
Attach Picavet cross to camera rig
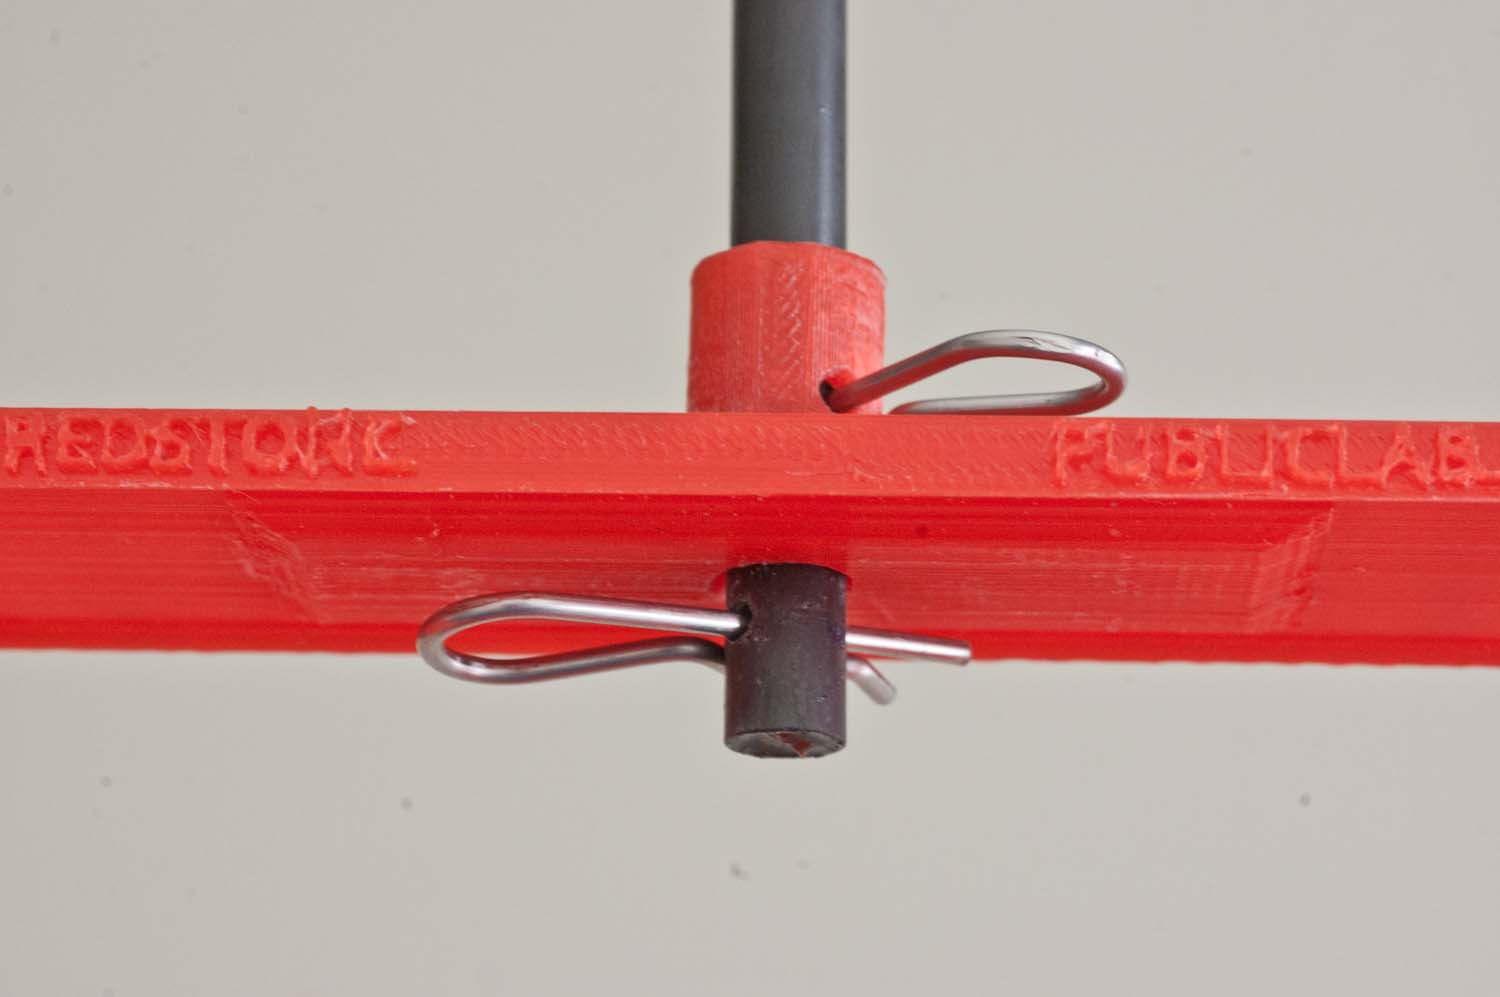
- When the epoxy is set, insert the shaft into the center hole in the Picavet cross from the top. The locking rod should fit into any of 16 positions. Some adjustments (bending or straightening) might allow it to fit more snugly into the slots.
- If the locking rod is not snug, a rubber band or piece of Velcro could be used to hold it in place.
- Insert the shaft into the bracket on top of the rig frame and insert a cotter pin through the lowermost hole until it locks.
- Slide the shaft in the bracket until the third hole lines up with the hole drilled through the bracket and insert the other cotter pin so it locks.
- Both cotter pins are important. One prevents rotation of the rig and the other prevents catastrophe if the plastic bracket fails.